Ever wondered how to test and play around with your PHP code without having to upload files online each time? Imagine having a private web server right on your computer where you can code, tweak, and experiment with PHP as much as you want.
That’s exactly what XAMPP provides! It allows you to create a fully functional local environment for developing, debugging, and testing your PHP websites or applications.
Whether you’re a beginner learning the basics of PHP or a developer working on larger projects, running PHP files locally on XAMPP is a game-changer. You can save time, avoid the hassle of constant uploads, and work offline whenever you need.
In this step-by-step guide, I’ll walk you through everything you need—from downloading and installing XAMPP to creating and running your first PHP file. Plus, we’ll cover common issues like port conflicts and how to solve them, so you’re prepared for any hiccups along the way.
By the end of this guide, you’ll have a local development setup ready to handle PHP projects with ease. So let’s dive in and get your personal PHP server up and running on your computer!
What is PHP and Why Use It?
PHP (Hypertext Preprocessor) is one of the most widely used server-side scripting languages, perfect for developing dynamic websites and applications. Unlike HTML, which is static, PHP can interact with databases, process forms, and even generate web pages on the fly.
Its flexibility, combined with its powerful database integration capabilities, makes PHP a top choice for web developers worldwide.
Why XAMPP is Perfect for Running PHP Locally
XAMPP (which stands for Cross-Platform, Apache, MariaDB, PHP, and Perl) provides a fully equipped environment for PHP development. It includes the Apache server, MariaDB (an alternative to MySQL), PHP, and Perl, all bundled together for easy setup and use. Here’s why it’s ideal:
-
Offline Development: Test and develop PHP code without internet dependency.
-
Full Web Server Package: Includes Apache for running PHP, MySQL (MariaDB) for databases, and even phpMyAdmin for easy database management.
-
Free and Cross-Platform: Runs on Windows, Mac, and Linux, and it’s open source.
Though there are alternatives like WAMP (Windows-only) and Laragon, XAMPP remains a popular choice due to its ease of use.
Installing XAMPP on Your System
Step 1: Download XAMPP

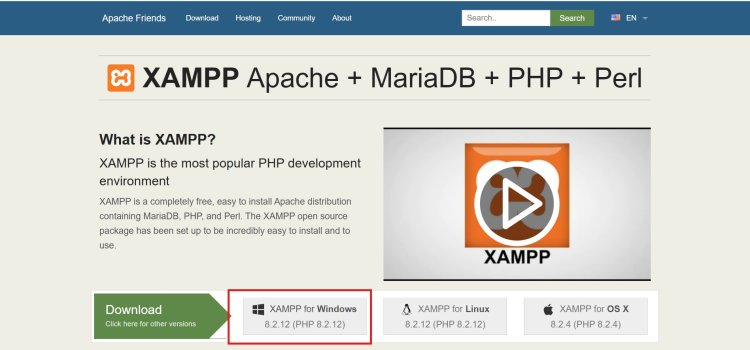
Start by downloading XAMPP from Apache Friends’ official website. Be sure to select the version compatible with your operating system (Windows, Mac, or Linux).
Step 2: Run the Installer

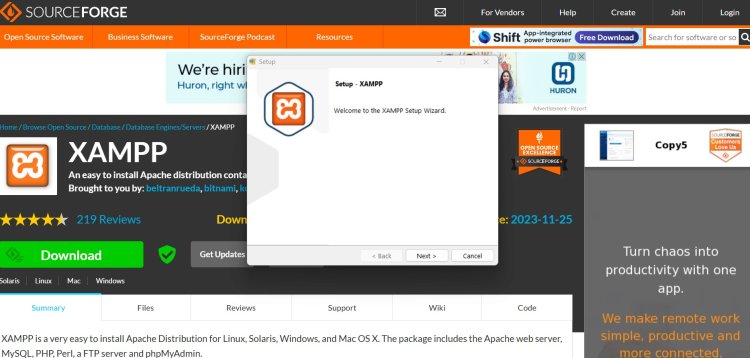
Open the downloaded file and follow the installation prompts. Here are a few tips for each step of the installation:
-
Choose Components: Ensure Apache, MySQL, and PHP are selected. These are essential for running PHP files and handling databases.
-
Install Location: By default, XAMPP will install in the C:\xampp directory on Windows. For simplicity, keep this default location.
After installation, open the XAMPP Control Panel.
Step 3: Start Apache and MySQL

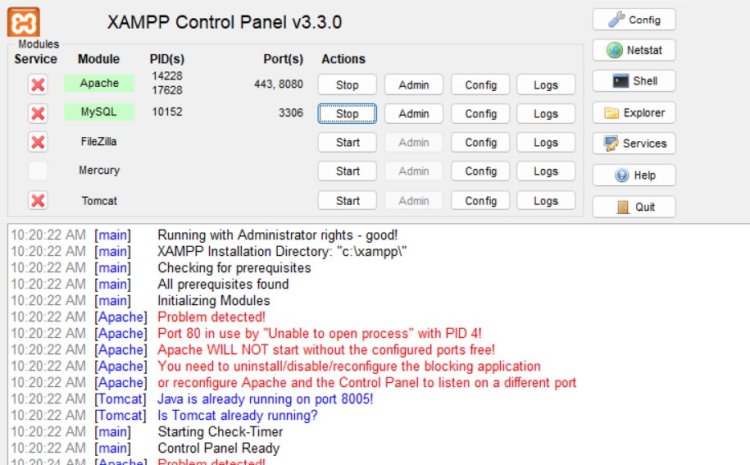
In the XAMPP Control Panel, start both Apache and MySQL by clicking “Start” next to each. Apache runs PHP files, while MySQL (MariaDB) is used for database management.
Troubleshooting Common XAMPP Installation Issues
Problem 1: Port 80 Already in Use by PID 4
If you see an error saying:
Port 80 in use by "Unable to open process" with PID 4!
Apache WILL NOT start without the configured ports free!
You need to uninstall/disable/reconfigure the blocking application or reconfigure Apache and the Control Panel to listen on a different port.
This usually means another application (often Skype or Windows IIS) is using Port 80.
Solution:
-
Reconfigure Apache to Use a Different Port: In the XAMPP Control Panel, click "Config" next to Apache, then open httpd.conf. Find the line that says Listen 80 and change it to another port, like Listen 8080.
-
Change Apache ServerName Port: In the same file, find the ServerName localhost:80 line and update it to ServerName localhost:8080.
Once done, restart XAMPP and try running Apache again. Now, you’ll need to access XAMPP on http://localhost:8080 instead of the default port.
Problem 2: MySQL Fails to Start
Sometimes, MySQL won’t start if another instance of MySQL is running or if there’s a permission issue.
Solution:
-
Check for Other MySQL Services: Go to Task Manager, look for any MySQL-related services, and stop them.
-
Run XAMPP as Administrator: Running XAMPP with admin permissions can often solve permission-related issues with MySQL.
Setting Up and Testing PHP in XAMPP
Once XAMPP is installed and running, let’s check if PHP is set up correctly:
-
Open the XAMPP Control Panel and ensure both Apache and MySQL are running.
-
Access the XAMPP Dashboard: Open your browser and type http://localhost. If you see the XAMPP welcome page, Apache is set up correctly.
To further verify PHP:
Create a PHP Test File: Open a text editor (Notepad, VS Code, Sublime Text) and type:
phpinfo();
?>
-
Save it as test.php in the htdocs Folder: This folder acts as the root directory for your PHP files and can be found in C:\xampp\htdocs on Windows.
-
Run the Test File: In your browser, type http://localhost/test.php (or http://localhost:8080/test.php if you changed the port). You should see a PHP information page displaying all the PHP configuration details.
Creating Your First PHP File in XAMPP
Let’s make a simple “Hello World” PHP file.
Open a Text Editor: Write the following PHP code:
echo "Hello, World!";
?>
-
Save it as index.php: Place this file in the htdocs folder, typically located in C:/xampp/htdocs on Windows.
-
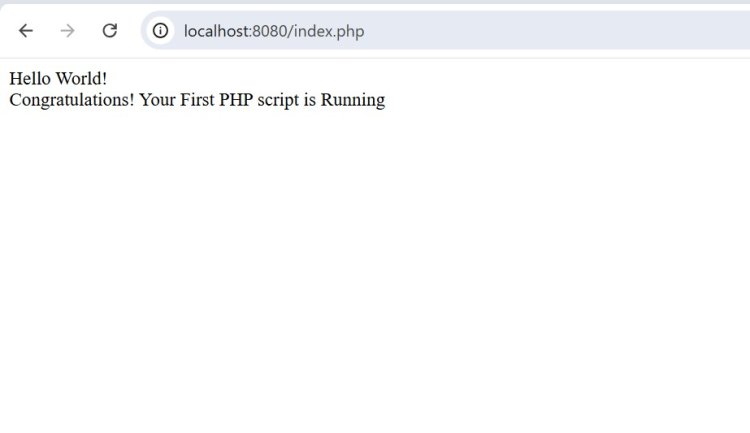
Access the File in Your Browser: Go to http://localhost/index.php (or http://localhost:8080/index.php). If you see “Hello, World!” displayed, your PHP file is running successfully.

Using phpMyAdmin to Manage Databases
phpMyAdmin, included with XAMPP, lets you manage databases easily:
-
Open phpMyAdmin: Navigate to http://localhost/phpmyadmin in your browser.
-
Creating a Database: Click “New,” name your database, and click “Create.” This database is now ready for use with your PHP projects.
Testing and Debugging PHP Code Locally
Running PHP files locally is incredibly useful for debugging. Here’s how to get the most out of it:
Enable Error Reporting: To catch any errors in your code, add the following line at the top of your PHP script:
ini_set('display_errors', 1);
error_reporting(E_ALL);
-
Refreshing After Edits: After making changes, refresh http://localhost/filename.php to view the latest updates.
Updating PHP in XAMPP
To update PHP to the latest version in XAMPP:
-
Download the Latest PHP Version: Go to PHP’s official download page and download the latest PHP version compatible with your system.
-
Replace the PHP Folder: In your XAMPP installation directory, rename the old php folder (e.g., php_old) and extract the new PHP folder you just downloaded.
-
Configure Apache to Recognize the New PHP Version: In the XAMPP Control Panel, open Apache’s config (httpd-xampp.conf), find the PHP path lines, and update them to point to the new PHP folder.
Using XAMPP to Host PHP Websites Locally
Testing and hosting your PHP website locally on XAMPP is simple:
-
Create a Project Folder: For example, C:/xampp/htdocs/myphp.
-
Access Your Site: Type http://localhost/myphp in your browser to view your project.
When you’re ready to publish, simply upload your files to a live web host.
Common Issues When Running PHP Files on XAMPP
Here are some common problems and quick fixes:
Issue: Apache Won’t Start (Port Conflict)
-
Cause: Another application is using Port 80 or 443.
-
Fix: Change Apache’s port in httpd.conf to something like 8080.
Issue: phpMyAdmin Access Denied
-
Cause: Incorrect configuration in the config.inc.php file.
-
Fix: Edit config.inc.php and make sure the username is “root” with no password (if using the default XAMPP setup).
Issue: MySQL Won’t Start
-
Cause: MySQL may already be running or have a conflicting service.
-
Fix: Check Task Manager for MySQL processes and stop them before retrying.
Conclusion
Using XAMPP to run PHP files locally is a game-changer for developers of all levels. Whether you’re testing a new feature, creating a small application, or building a full-scale project, XAMPP provides everything you need. Now that you’re familiar with setup, basic file handling, and troubleshooting, it’s time to dive into development and start bringing your PHP ideas to life!
Frequently Asked Questions (FAQs)
1. How do I start MySQL in XAMPP?
In the XAMPP Control Panel, just click "Start" next to d.
2. What’s the difference between WAMP and XAMPP?
XAMPP is cross-platform and comes with more tools, while WAMP is Windows-only.
3. How can I test PHP code in XAMPP?
Place your PHP file in htdocs and open it in the browser using http://localhost/filename.php.
4. How do I open PHP files in my browser?
Save the PHP file in htdocs, then type http://localhost/filename.php in your browser.
5. What are some beginner-friendly PHP projects?
Start with a to-do list, contact form, or user login system. These are great for building your skills!
6. Do you need MySQL to start a MySQL database on XAMPP?
Yes, you need to start the MySQL service in XAMPP to use a MySQL database locally. When you start MySQL in the XAMPP Control Panel, it launches the database server on your local machine, allowing you to create, manage, and connect to MySQL databases from your PHP applications. Without starting MySQL, your PHP files won’t be able to connect to a MySQL database in the XAMPP environment.
Does Google Analytics work on localhost?
No, Google Analytics does not work effectively on localhost. Since localhost refers to your local machine, it isn’t publicly accessible, meaning Google Analytics cannot track or verify visits to your site. The tracking relies on real user interactions from a public domain, and because localhost doesn’t have a public IP address, it cannot capture any meaningful data.
