A signup page is one of the most essential components of any web application. Whether it's an e-commerce website, a social media platform, or a personal blog, user registration is crucial. In this multi-part series, we’ll walk through the process of building a fully functional signup page using PHP and MySQL.
What You’ll Learn in This Guide
-
How to create a basic signup form using HTML and CSS.
-
How to handle form data with PHP.
-
How to store user data in a MySQL database.
-
Basic error handling to manage common form submission issues.
By the end of this guide, you'll have a working signup page that accepts user data and stores it in a database. This is Part 1, where we’ll cover the on-page signup form and initial backend setup. Future parts will cover user validation, password hashing, and login functionality.
Understanding the Signup Process
Before jumping into the code, let’s break down what happens in a signup process:
-
User enters details (name, email, password) in a form.
-
Form data is submitted to the backend (PHP).
-
PHP processes the data (validates input, checks for duplicate emails, etc.).
-
Data is stored in the MySQL database.
-
User gets feedback (success or error message).
Note: We’ll add validation, security measures, and hashing techniques in later parts.
Setting Up the Project
Before we start coding, let's set up the required tools:
1. Install XAMPP (or any local server)
XAMPP provides an Apache server, MySQL database, and PHP interpreter.
-
Download from Apache Friends
-
Install and start Apache and MySQL services
2. Create a New Project Folder
Organizing files properly makes development easier. Inside the htdocs folder of XAMPP, create a new folder named signup_project.
/signup_project
├── index.php (Form page)
├── style.css
├── process_signup.php (Handles form submission)
├── db_connect.php (Database connection)
3. Create a MySQL Database
If you don't know how to setup localhost then you can read How to Create MySQL Database and Database User in cPanel
-
Open phpMyAdmin (http://localhost/phpmyadmin/)
-
Create a new database named user_system.
-
Inside the database, create a table users with these fields:
CREATE TABLE users (
id INT AUTO_INCREMENT PRIMARY KEY,
name VARCHAR(100) NOT NULL,
email VARCHAR(100) NOT NULL UNIQUE,
password VARCHAR(255) NOT NULL
);
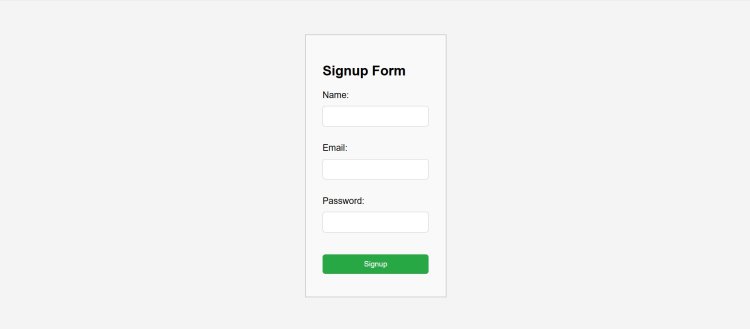
Creating the Signup Form (Front-End)
Now, let's create the HTML signup form inside index.php.
<!DOCTYPE html>
<html>
<head>
<title>Signup Page</title>
</head>
<body>
<h2>Signup Form</h2>
<form action="process_signup.php" method="POST">
<label>Name:</label>
<input type="text" name="name" required><br>
<label>Email:</label>
<input type="email" name="email" required><br>
<label>Password:</label>
<input type="password" name="password" required><br>
<input type="submit" value="Signup">
</form>
</body>
</html>
This is a basic signup form that collects user input and sends it to process_signup.php via the POST method.
Adding Basic CSS for Styling
To make the signup form visually appealing, let's create styles.css and add some basic styling:
body { font-family: Arial, sans-serif; background-color: #f4f4f4; display: flex; justify-content: center; align-items: center; height: 100vh; margin: 0;}.container { background: #fff; padding: 20px; border-radius: 8px; box-shadow: 0 0 10px rgba(0, 0, 0, 0.1); text-align: center;}form { display: flex; flex-direction: column;}input { margin: 10px 0; padding: 10px; border: 1px solid #ccc; border-radius: 5px;}input[type="submit"] { background: #28a745; color: #fff; border: none; cursor: pointer;}input[type="submit"]:hover { background: #218838;}
Handling Form Submission with PHP
In process_signup.php, we will:
-
Capture form data.
-
Validate that fields are not empty.
-
Store data into the database.
<?php
include 'db_connect.php'; // Include database connection
if ($_SERVER["REQUEST_METHOD"] == "POST") {
$name = $_POST['name'];
$email = $_POST['email'];
$password = $_POST['password'];
if (empty($name) || empty($email) || empty($password)) {
echo "All fields are required!";
} else {
$query = "INSERT INTO users (name, email, password) VALUES ('$name', '$email', '$password')";
if (mysqli_query($conn, $query)) {
echo "Signup successful!";
} else {
echo "Error: " . mysqli_error($conn);
}
}
}
?>
Connecting to the Database
Create a separate file db_connect.php to handle database connection.
<?php
$servername = "localhost";
$username = "root";
$password = "";
$database = "user_system";
$conn = mysqli_connect($servername, $username, $password, $database);
if (!$conn) {
die("Connection failed: " . mysqli_connect_error());
}
?>
Why separate ``? It keeps code organized and reusable across multiple files.
Final Look:
If you've followed everything correctly, congratulations! You've successfully built your first fully functional signup page.
Now, while this is a basic implementation, the key takeaway is that it works—it accepts user input and securely stores the data in your database. And that’s the foundation of any signup system.
In the next chapters, we'll dive deeper, adding more advanced features to make our signup page more secure and efficient. Stay tuned!
Read Next: PHP Error Handling Guide (to manage errors effectively)
Conclusion
By now, you should have: ✅ A working signup form. ✅ A connected MySQL database. ✅ A script that stores user data.
This is just the beginning! Security and validation are crucial for real-world applications, and we'll cover them in Part 2.
Stay tuned, and let us know in the comments if you have any questions! ????